Learn how to make a recurring sales receipt in QuickBooks Online.
Do you need to collect payments from your customers every month? Don't worry. QuickBooks lets you schedule recurring sales receipts so you don't have to create one every time. Here’s how.
Note: You can also set up autopay for recurring invoices so you no longer have to keep track of your customer's payment information.
Create a recurring sales receipt
A recurring sales receipt automatically charges a customer at a given interval.
| Note: If you enter a number in the days in advance field, the charge will process on the date you created the transaction. For example, if you created a sales receipt on the fifth that recurs on the 15th of each month, the charge will process on the fifth. |
- Go to Settings ⚙ and select Recurring transactions.
- Select New.
- Select the Transaction Type▼ dropdown menu, select Sales Receipt, then OK.
- Enter a template name. This won’t appear on the transaction.
- From the Type▼ dropdown menu, select Scheduled.
- Select the customers name from the Customer▼ dropdown menu. Then, verify the email. You can select Automatically send emails to send notifications to your customer when you process their payment.
Note: Make sure to select a customer name so you can enter the ACH banking information. - Set the interval. For example, if you need a sales receipt every first day of the month, the interval is Monthly on day 1st of every 1 month.
- Enter the start date and when it should end.
- If you select None, then it will repeat without end.
- If you select By, enter the end date.
- If you select After, you can enter the number of times you want the sales receipt to repeat.
- Select the Payment method▼ dropdown, select Credit card type or Check.
- Credit card type: Select Enter credit card details to enter the customer's credit card information. Then, select OK.
- E-Check: Select the authorization link to send the Bank Transfer Authorization form to your customer. Check the box to ensure the payment will process each time a form is created.
- Enter the line for the product or service and amount.
- Select Save template.
Note: If you want, you can also customize your template.
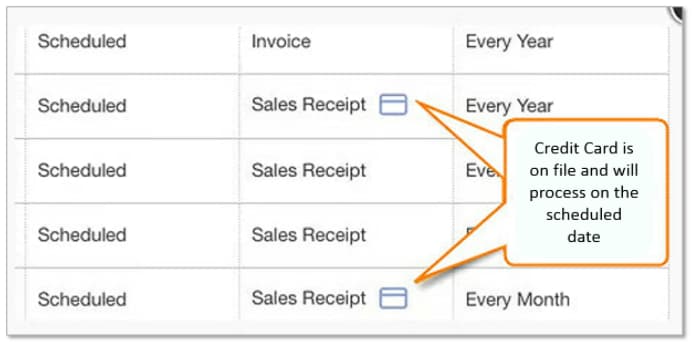
If the recurring transaction is set up correctly, you’ll see a credit card icon next to Sales Receipt.
Download the credit card billing authorization form
Before you set up a recurring credit card billing, Visa and Mastercard require a written authorization form from your customer.
When you enter the customer’s credit card info, you’ll see the link to download the authorization form. Ask your customer to fill out, sign, and return the form to you before the first recurring charge. For your protection, keep the signed form in a safe place for 18 months after the final charge takes place.