Learn how to condense your QuickBooks Desktop file for import to QuickBooks Online.
This article is a guide if you need to remove unused or inactive list entries in your Desktop data before converting it to QuickBooks Online. Also, you can use this as a reference if you encounter the message when attempting to import your QuickBooks Desktop data to QuickBooks Online. Here’s how to fix it:
Reminders about condensing and importing the file
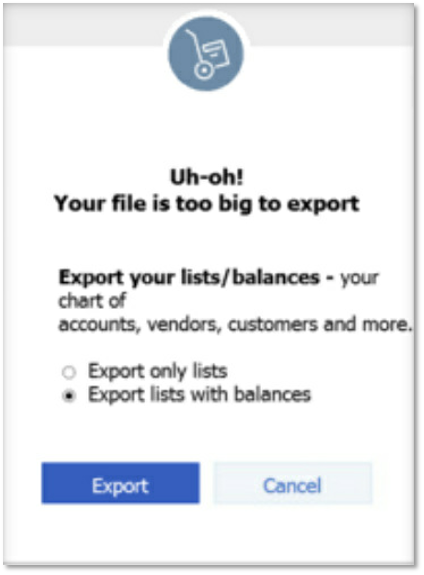
- File size (MB) doesn't matter when importing to QuickBooks Online. Targets do.
- To convert your Desktop data to QuickBooks Online, the Desktop file must be less than the following limits:
- QuickBooks Desktop Enterprise 2021 (with latest releases) and newer 750,000 targets.
- QuickBooks Desktop Pro and Premier 2018 (with latest releases) and newer 750,000 targets.
- QuickBooks Desktop Enterprise 2020 and older 350,000 targets.
- QuickBooks Desktop for Mac 350,000 targets.
- QuickBooks Desktop Pro and Premier 2018 and older 350,000 targets.
- When you condense a file:
- QuickBooks 2019: The overall file size is reduced and you get to keep all your data and details.
- QuickBooks 2018 and earlier: Some transactions are archived and turned into Journal Entries.
- Journal Entries generate targets as well.
- Reports may not match after condensing a file.
- QuickBooks automatically creates an archived copy of your company file in the original folder your file is saved in and names it "[Your Company File Name] Copy MM/DD/YY."
- You can easily restore your original company file from either the backup or archive copy.
- Make sure to store either file in a safe place.
- If you’re having performance issues, the Condense Data Utility should be your last option to try to improve performance. See Use the Condense Data utility for more information.
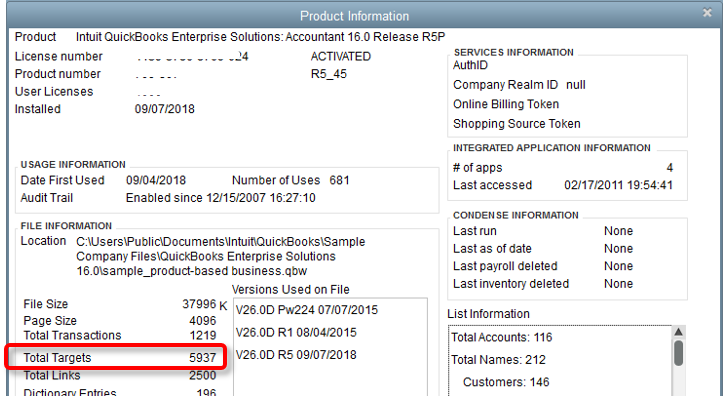
Check targets in a QuickBooks company file
- Open your QuickBooks Desktop company file and access Product Information:
- Windows: Press F2 on your keyboard.
- Mac: Press CMD (?) +1 on your keyboard.
- Check the Total Targets number.
Condense your QuickBooks Desktop data for a QuickBooks Online Import
QuickBooks Pro/Premier 2012 or Enterprise 12.0 and later
- From the QuickBooks File menu, select Utilities and then Condense Data.
- Select Yes to the message Budget data may be moved during cleanup. Do you want to continue anyway?
- In the Condense Data window, select Transactions before a specific date.
- Use the Date field to select a date. QuickBooks will remove closed transactions on or before the date you choose.
Note: If you track inventory, it’s best to make the date the last day of the month. That way, your average cost for items will remain correct. - Select Next.
- Select a method to summarize the transactions you're removing then Next. If you're not sure, select Help me choose.
- (Optional) Select any of the check boxes for the dialog boxes that follow then select Next.
- Select Begin Condense.
QuickBooks Pro/Premier 2006 to 2011 or Enterprise Solutions 6.0 to 11.0
- From the QuickBooks File menu, select Utilities and then Clean Up Company Data.
- Select Yes below the message "Budget data may be moved during cleanup. Do you want to continue anyway?"
- Select Remove Transactions from a certain date.
- Use the Date field to select a date. QuickBooks will remove closed transactions on or before the date you choose.
- Select Next.
- (Optional) Select any of the checkboxes under Select Additional Criteria for Removing Transactions then Next.
- (Optional) Select any of the checkboxes under Select Unused List Items to Remove then Next.
- Select Begin Cleanup.
- Select OK below the message about making a backup before cleaning up the data file.
QuickBooks for Mac
- Close all your QuickBooks windows.
- Select File then Utilities and then Condense Data.
NOTE: If you track inventory, it’s best to make the date the last day of the month. That way, your average cost for items will remain correct. - Select OK. A message appears telling you that QuickBooks will make a backup file before it condenses the transactions.
- Select OK to create the backup file.
- The backup file ensures that you will still have a record of the details of any transactions that QuickBooks removes from your company file.
Done condensing? If you've successfully condensed the file and you now have fewer targets than the limits above, continue to move your QuickBooks Desktop (Windows or Mac) to QuickBooks Online.
Resolve possible issues after importing the condensed file
Creating a portable company file
- Select the File menu then choose Create Copy.
- Select Portable Company File then choose Next.
- Save the portable company file to your desktop or create a new folder on your computer.
- Intuit recommends you save it to a CD, USB flash drive, or other removable storage device.
- The portable company file is saved with a .qbm extension.
- This will provide a safeguard against data corruption or loss of data if your system becomes compromised.
- When prompted to close your company file, select OK.
Important: If you click Cancel, QuickBooks exits the wizard and doesn't create the portable file.
Restoring the portable company file
After you create a portable company file (.qbm), you can restore the file on the destination computer. QuickBooks decompresses the file and then rebuilds your company file. This process may take a few minutes.
- Select the File menu then choose Open or Restore Company.
- Select Restore a portable file then choose Next.
- Browse to the location where you saved the portable file.
- Select the portable file then choose Open.
- Select Next.
- This will open a Save Company File As window.
- To prevent overwriting your existing company file, rename the company file by typing a new name in the File name field.
- After renaming the file, select Save. QuickBooks converts the portable file to a regular company file with a .qbw extension.
- You will be prompted to perform a backup of the new company file. Follow the wizard to complete the backup.
- Check the file size again. If the file has more than the target limit above then go back and repeat the process and remove as much data as possible. The .qbw file created from the portable company file might be smaller than your condensed .qbw file. This is normal.